Showing posts with label Photos. Show all posts
Monday, July 11, 2011
Finding beauty in the details
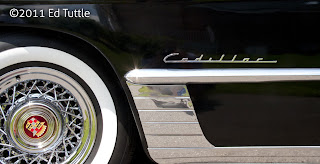
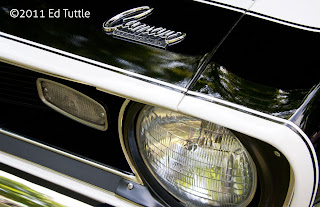
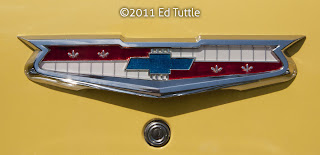
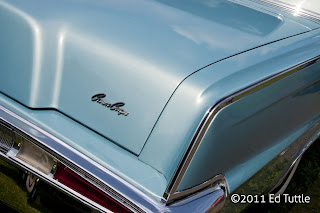
This past June I brought my camera to the Klingberg Vintage Motor Car Festival in New Britain, CT. While so many people were taking snapshots of the exquisite autos at this show, I became fascinated by the beautiful lines and shapes in the details. Standing just a couple of feet away from a fender, a young lady asked me what I was shooting. It reminded me of realizing how odd I looked standing inches away from a giant sequoia, taking pictures of the beautiful red bark. Hope you enjoy these shots... and are encouraged to look for beauty and design in the details around you.
Saturday, January 29, 2011
Creation of Adam
OK... So I said I'd be posting a portrait a week. And hopefully I'll finish the piece I'm working on by tomorrow.
So there you are, rolling your eyes, saying to yourself,"He's slacking already!" But before you jump too quickly, the reason I'm late with this week's portrait is that I've been given an invitation to hang and sell my work in a gallery here in Connecticut. Other than my thesis presentation, I've never had a gallery show. I'll be posting more details about it later. Here's a link to the gallery.
In lieu of a new portrait, allow me to share an image I created for a book cover. The challenge was to portray God seeing Himself in His own creation. While taking a drive to get some coffee, clear my head, and find some inspiration, the thought occurred to me that Genesis tells us Adam was created in God's image, and that he was fashioned from the dust of the ground. I bought my coffee (priorities!) and headed off to the nearest Home Depot to buy a couple bags of potting soil.
Layering the floor of my studio with cardboard and newspaper, I emptied the bags, moistened the soil and began to sculpt.
I hope you find this portrait inspiring. And I promise to have my next image up soon.
So there you are, rolling your eyes, saying to yourself,"He's slacking already!" But before you jump too quickly, the reason I'm late with this week's portrait is that I've been given an invitation to hang and sell my work in a gallery here in Connecticut. Other than my thesis presentation, I've never had a gallery show. I'll be posting more details about it later. Here's a link to the gallery.
In lieu of a new portrait, allow me to share an image I created for a book cover. The challenge was to portray God seeing Himself in His own creation. While taking a drive to get some coffee, clear my head, and find some inspiration, the thought occurred to me that Genesis tells us Adam was created in God's image, and that he was fashioned from the dust of the ground. I bought my coffee (priorities!) and headed off to the nearest Home Depot to buy a couple bags of potting soil.
Layering the floor of my studio with cardboard and newspaper, I emptied the bags, moistened the soil and began to sculpt.
I photographed the final sculpture and began to play in Photoshop. The final portrait below illustrates the creation story with the shoulder being formed out of the ground, the face taking shape and then turning to flesh after God breathed His Spirit into him.
Saturday, January 15, 2011
Create elaborate patterns from a single flower
Here's an easy way to create some beautiful patterns that could be used for fabrics, scarves, or just plain fun... all from a single image of a flower and some Photoshop magic.
Each flower you use yields a unique image. Here's a sample of a pattern I created using an image of a snapdragon.
![]() |
| For this demonstration I chose a photo I have of a pansy, one of my wife's favorite flowers. |
![]() |
| Isolate the image of the flower and place it on a separate layer in a new document. Drag guides from the top and bottom to mark the center of the document. |
![]() |
| Repeat this process with the 3 top layers, then the top 2 and finally the remaining top layer. Create a group from all the flower layers. |
![]() |
| Duplicate the group. With the new group selected, select Edit => Free Transform, rotate the group 36 degrees, and scale and move the selection until it covers the background area. |
![]() |
| Now for some fun. Add a Hue/Saturation adjustment layer above the background and play with the hue. |
![]() |
| To take it a step further, experiment by changing the blending mode of the groups. You can see the variations by just changing the blending mode of the top group. |
Wednesday, January 12, 2011
Views from the Second Floor
Here are some pics of the latest snowstorm here in Conneticut... taken from the safety of my studio and bathroom! Haven't seen it like this in years. Click on pics for a larger view...
Subscribe to:
Posts (Atom)